Friday 31 October 2014

Striking, Scary, Frightening Dark Angel Makeup Tutorial


Dark Angel/ Dark Swan Makeup Tutorial


Surprise everyone, this is what I am going as for Halloween this year, even though I am just staying at home. But I am a dark angel this year and this is what I currently look like right now (the image above). But I know that for all of you depending on where you are that all the parties and things are going to start in a few hours time and this makeup is going to be a tight squeeze for some of you. But, if you want to know how to get this scary and very dark, dark angel/swan look. Then please keep on reading. 

Step1: 


Prime your face and your eyes and do not apply any foundation because we're pretty much using just black eyeshadow and there will be a lot of fall out as there was for me. 

Take an extremely dark black matte shadow, (mines from MUA's Glamour Nights pallet), on a flat eyeshadow brush and take it all over the lid. Making sure you get right near the root of your lashes because we don't want any skin showing through.

Step 2: 


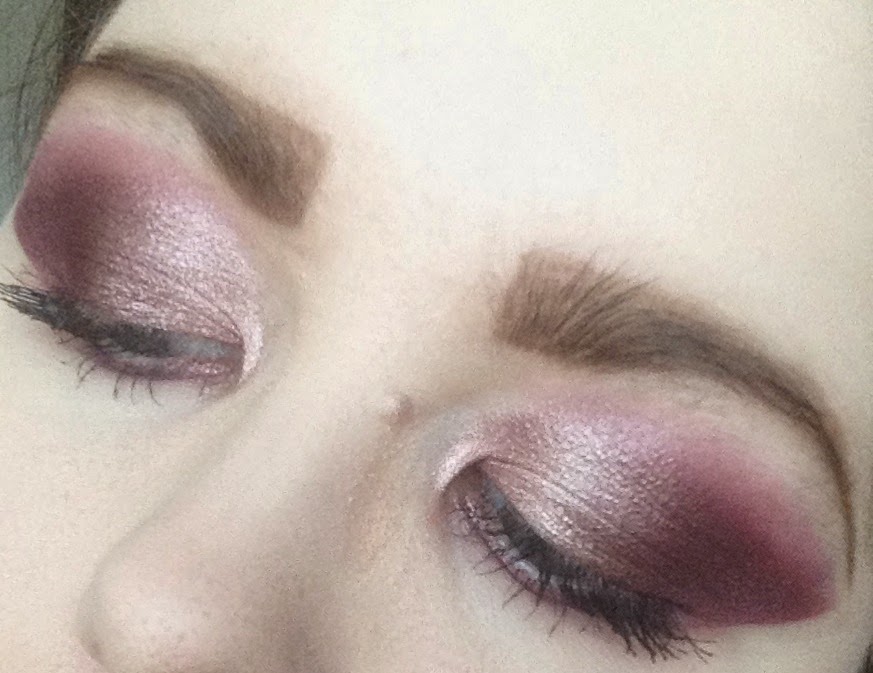
Next, take the dark black matte shadow again on the same brush and take the shade up over your crease. 

Now, take the dark black matte shade on a fluffy blending brush and blend up above your crease; blend the outer corner creating a round ish shape (you can see in the image above) 

Step 3: 


Now were taking a makeup wipe and making those outer corners more on point (quite literally). So, go from the end of your lash line on your outer corner and gently go up to create a strong line. 

Then gently make it more even and precise along the top of your lid, so just remove and/or add more of the black shadow if you need to. 


Once all of the adding and removing is complete, your eyes should look something like this when you look straight in front of your mirror. 

Step 4: 


We may be dark, scary, and mysterious but that doesn't mean us dark angels can't have a pop of colour. So take a dark shimmery purple shade, (mine is from the MUA Glamour Nights pallet and Makeup Revolutions Ultimate Eyeshadow Collection pallet), and just use your brush and your finger to pack that colour in the middle of your eyelid. 

Step 5: 


Then apply your base and you currently should look like this. Do not worry about any fall out for the next few steps because, well, you'll find out why next.  

Step 6: 


Now for the extremely fun part, creating the wings. So, take an extremely small brush that will define shapes easily. I had to use my lip brush for this because it was the only brush I had the had the least hairs. 

But, take your small brush with the dark black matte shade and create small wisps in different directions to create a small feather effect. 

Step 7: 


Then I did basically the same step as before but took the black shade lower and fluffed it out a bit more in different directions. I also fluffed it out along the point from our outer corner and make sure you do this because it ties the whole look together. 

Step 8: 


Then do the same but take it a little darker to show different dimensions and shades of your dark angel wings/swan feathers. 

Step 9: 

Take the purple we applied to our lid earlier and run it along the lower lash line. 

Step 10: 


At this point your eyes are complete and you should have something like this on each eye. 

Step 11: 


Then apply your mascara. I used Maybelline's The Falsies and Lash Extreme Volumising mascara. I would definitely suggest applying false lashes to give the illusion of wings and/or feathers if your taking this a dark swan look. Unfortunately I didn't have any and I can't wear them because of my glasses. But if you can get your hands on some I definitely would use them. 

Step 12: 


Then guys were taking a lighter black shade to contour the hollows of our cheeks with. Now, we very careful with this because I applied the colour a little too much and it was very black and I had to try hard to fade it out and it didn't work that much. So, when your apply the contour colour start of lightly and do not get too much colour on your brush, or else, it will be way too black. 

Step 13: 


Were taking the matte black we used earlier and are applying it all over our lips. Now, don't worry too much about the middle bit, just mainly focus on getting the outline shape of our lips in the black. 

Step 14: 


 Remove the middle black part with a makeup wipe as eyeshadow can make your lips extremely dry. 

Step 15: 


Then take a dark purple lipstick, mine was Sleek's Smother. Then over the top I applied the matte black again so there would be so moisture underneath the lip in the middle section. Also, so dark purple would poke through the black to match the eyes. 

Step 16: 


 Guys, this the finished look! I absolutely love it, it is my first dark angel look and I think it represents it really well. I love how intense the eyes are because of the feathered wings underneath my eyes etc. I just think the eyes look awesome. It'd be also cool if you could wear it with white or black contacts to make it extra dark and creepy. Also how the inner corners link with the under eye parts; it all flows together seamlessly. 

Anyway guys, thank you for reading if you did and I hope this dark angel and my previous vampire makeup tutorial inspired you for your Halloween party tonight. Even though I am doing nothing, I feel like having makeup for the occasion or a costume still makes you get into the Halloween spirit. I think this post is a good way to round off October and thank you all for still supporting my blog! 

Happy Halloween everyone and I'll talk to you soon!

Bye,

Katie 
xoxoxo

Wednesday 29 October 2014

Striking, Sexy, Seductive Dead Vampire Makeup Tutorial


Vampire Makeup Tutorial 


Who's ready to get bitten this Halloween? 

Hello my lovelies, I hope you're ready to unleash you're inner vampire desire because this look above is what we're all going to become today. But this is so exciting because this is my first ever Halloween tutorial to be posted on my blog! (Woohoo, celebration) 

But anyway, this is not my first vampire look. For those of you who don't know, I went to a Halloween party last year with Chloe and we decided to be Katherine and Elena from The Vampire Diaries, and it was not as great as my vampire makeup for this year. As this year I am not a specific vampire from a show, I am just a dead vampire. But, if you want to know how to be a striking, sexy, and seductive dead vampire, then please keep on reading. 


Step 1: 


Start of by priming your face or applying moisturiser as your base. Do not apply any foundation or concealer because with black or any very dark eyeshadows can stain whether it's will fall out or just from small droplets of powder. As if you do not apply any foundation base first it's easier to wipe away, where as if you apply your base first, it's much harder to fix if you get a lot of fall out. 

For this look I used colours from my Makeup Revolution pallet that I used in my last tutorial and also one of my Body Collection pallet's from Bodycare. 

After priming your face, take a matte black on a flat eyeshadow brush and apply it all of the lid. I wet my brush a little to a get a bit of a darker black colour pay off. Once you've applied your matte black, take the same eyeshadow brush you just used and on the other side take a dark grey with a hint of purple glimmer in and apply that all over the black. 


Once you've done both eyes you should have something that looks like this as I rounded off the edges to begin with. You can also see on my cheek just under my eye where its got a bit of a black hint to it because of the fall out I got off my eyes. 

Step 2: 


Next on a fluffy brush take a deep pink or a red if you have one and merge it on top of the black going back and forth. Don't forget to take it all the way around your point on your outer eye. I know this red bit is quite high right now, but don't worry, we go back and clean it up later. 

Step 3: 


I felt like the red was too much, so I went back in with the matte black on a blending brush and decided to blend over the whole lid to give a more just black effect. Then I blended more black into the red to take away the purple colour it created and so it only showed a hint of red. 

Step 4: 


Now go in with a makeup wipe and get a more precise shape for your eye makeup. Be very gentle and take a little bit off at a time because you might remove too much if you're not careful. 

I then took my makeup wipe again and made the line of the sides more precise (going up from the end of the lash line) 

Once you done this to both eyes, you should end up with something like this. 


Step 5: 


Next take a lighter grey with a hint of purple in and then apply the matte black over the top. Then smoke the black out with the pinky red we used earlier and drag it down into your under eye area as you can see above. 

Also take it underneath the black point on the outer part of your eye. 

Step 6: 


I then just applied my foundation and my powder etc, as well as going over my under eye with that red for it to pop more as you can see it better in this image. 

Then we're going to contour our face mainly in the hollows of our cheeks to give that really sunken in and dead look. But I did contour on my forehead a little but mainly in my cheeks. All you need for this is a fan brush and a light matte grey shade. The grey can either be an eyeshadow or a proper contour grey shade. 

I used a eyeshadow on a fan brush and just went back and forth in the hollows of my cheeks by sucking my cheeks into my mouth so I could find where to place the grey. 


Step 7: 


Next apply your chosen mascara and do not apply eyeliner as I feel it is not worth it, you wont really see it because of the black eyeshadow, and it's not needed. 

Tip: When you're doing a dark makeup look, apply your eyebrows a little darker than you normally would because if you have a really dark eye look and light eyebrows, it wont flow nicely. So fill them in a little darker like I have. 

Step 8: 


Moving onto the lips, now as we're having vampire lips and to make them look like they've had fresh blood on them; firstly, we're going to apply black around the edge. Now, if you have a black lip liner, a black Kohl pencil, or even a black jel liner would probably work better than eyeshadow. But eyeshadow does still work if you don't have an alternative as I used eyeshadow. 

Just take the matte black on a brush and go around the outside of your lips leaving the middle as your natural lip colour. 

Step 9: 


Finally I took my bright red lipstick and placed it in the middle of my lips and blended it into the black. The whole reason is to make the black look like deep colour blood that has dried into the cracks of your lips, and the red is to look like it's fresh blood. 

Step 10: 


WE'RE FINISHED! 

I absolutely love this look because I think it portrays a vampire really well. I feel like just the whole look ties in together, especially the eyes. You can see how good the redness underneath the eyes looks really bright in this image, whilst at the same time it's deep and dark and I feel like it really adds to the dead look. I also love the grey contouring, I think it ties the whole look together really well and makes your whole face look sunken in and tired. 

I also think this is one of the best makeup looks I've done because I'm really proud of it as it's my own creation, I took no inspiration from any images on Google or Pintrest etc. I really hope you guys all love it as much as I do and if you want to go as a vampire to any Halloween party you've got coming up, I hope this is the look for you. If you guys do create this look let me know by tagging me on Instagram: katiej0hnson 

I also just want to say, you can wear glasses with this look, don't think you can't guys. I just didn't wear any for my final pictures like I usually do because I couldn't get a good shot of the eye look in the glasses. But when you look in the mirror, it still looks amazing with and without glasses guys!

Well guys thank you so much for reading and I will be doing another Halloween look on Friday which is actual Halloween, so I hope you're as excited as I am for it. 

I'll talk to you soon!

Bye, 

Katie 
xoxoxo

Sunday 26 October 2014

Seasonal Series: Autumn Leaves Inspired Makeup


Hello everyone, I hope you're all well and are very happy that it's half term. I am happy that it's half term, but I've got a lot of revision to do for my maths exam re-takes on the 5th and 7th of November. So I'm not really gonna have much free time. But when I am not doing maths I am going to be putting my time into you guys and the blog because I've been so bad with it during October because of all the maths revision I've been doing. 

But, this title is what it seems. I've decided to start Seasonal Series which means I will do an inspired makeup look for each season. So for this crisp season that is autumn, I decided to base this one on autumn leaves and you can get many kinds of autumn leaves. So I've decided to do 2 looks. This first one is based on the more pink/plum shades of autumn leaves. Then the next one is going to be the really light golden yellow shades. 

So everyone, just a little heads up. I swapped around my eyes and my base because I was using a lot of eyeshadows and this look to a lot of blending. However, because they eyeshadow pallet I used is so amazing, there was hardly any fall out. But the pallet I used is by my new favourite makeup brand and I am desperate to try more of their makeup. And that is Makeup Revolution and the pallet I am using is their Ultimate Eyeshadow Collection. Here is the link to buy it in Superdrug: http://www.superdrug.com/Makeup-Revolution/Makeup-Revolution-144-Eyeshadow-Collection/p/270841#.VE1ppPl_uw0

and to Makeup Revolution's website: http://www.makeuprevolutionstore.com/index.php/


Step 1: 


Please ignore my awful skin, it's not doing too amazingly right now. But first, I applied my primer all over my face and then this really light pearly pinky shade on my inner corners and I applied this on a flat eyeshadow brush. (row 5 in the pallet - shade 1) 

Step 2: 


Then I took a pinky toned brown/light plum shade and applied it into the middle of my eyelid; (row 5 in the pallet - shade 2) I blended it in with the pink by gently rubbing in the middle between both for it to flow really nicely as leaf colours flow into one another. So all you do is your take your flat eyeshadow brush and put a colour on each side. Then you blend them both together where they meet in the middle mixing both colours on your brush onto your lid. 

Step 3: 


Now, do not panic about this because I clean up the shape later. But I applied a matte plum shade on the outer half of the lid on a flat eyeshadow brush and took it up over the crease. I then blended it to smooth out the edges with a blending brush. (row 6 in the pallet - shade 5). 

Step 4: 

  
I then applied a gorgeous plum shimmer shade over the plum matte shade on the outer part of the lid with a flat eyeshadow brush. (row 6 in the pallet - shade 9).


Step 5: 


Next I just went back in with my flat eyeshadow brush and all of the shimmery shades and just went over them to intensify the colour and really blend the light plum brown shimmer shade with the plum shimmer shade. 

Step 6: 


I ran some of the matte plum shade along my lower lash line and smudged it out. Then I took a makeup wipe and cleaned up the edges and made them neater; along with a lot more wearable. 

Step 7: 


Next I applied my base: foundation, powder and eyebrows. If you guys would like me to to an in detail post about how I do my foundation base etc. Let me know in the comments or on my instagram. But after I applied my base I applied my two mascaras: Lash Extreme Volumising mascara and Maybelline's The Falsies. 

Step 8: 


Finally, I applied some of MUA's highlighter on my chin, the highest points of my cheeks, my cupids bow, the tip of my nose and the bridge of my nose, and my forehead. 

Then I applied my lipstick which is Sleek's Smother; a dark plum purple shade. I made sure the darkest part was in the middle of my lips and it faded out into more of a plum to represent the deepest colour in the middle like some leaves have. 

Then I just took out my plaits and pinned back some parts of my hair. And then this is the finished look! 

I absolutely love this look because it is extremely fall like but it doesn't have to just be as a seasonal inspired makeup tutorial. You could wear this to a formal event, a party, on a date etc. Now, obviously this look is pretty dramatic and it wont be for everyone, which is why I am doing another one which is not as dramatic colour wise. 

But, I hope you all enjoyed my take on purple autumn leaves and like the fact I am doing a makeup seasonal series. If you do, let me know in the comments below and leave me some other seasonal looks you'd like to see for autumn/winter time. Obviously in winter I am going to be doing a snow/ice inspired makeup look, but if there's any others you guys would like me to do. Please let me know down below! 

Thank you all so much for reading and I'll talk to you soon! 

Bye for now, 

Katie 
xoxoxo

Saturday 18 October 2014

Black and Blue Toned Silver Party Look!


Hello everyone, I hope you're all well, and welcome back to my blog! Today as the title suggests, I have a party makeup tutorial for you as some of you have asked me to do a party look, so here it is! 

Step 1 


Apply your base as your normally would: 

- NYC Perfecting Primer
- Rimmel London's Lasting Finish 25 HR Nude Collection - Light Porcelain (applied with a beauty blender and I used two coats as it's medium coverage) 
- Rimmel London's Wake Me Up Concealer in Ivory (applied with a beauty blender - desperately need a new concealer as it is too dark for this foundation!) 
- Rimmel London's Stay Matte Powder in Translucent 
- Rimmel London's Brow Pencil in Dark Brown 

Step 2


Firstly, take a light matte black on a fluffy brush and gently go back and forth above your crease. Be extremely careful when applying black eyeshadow because it is hard to correct if it goes wrong, and if you press to hard or go in with it too viscously it won't look right. So with black, just be careful. 

Step 3 


Next on a flat eyeshadow brush I took a silver and applied this all over my lid. I also used to finger to press on some colour to get a stronger silver coming through. 

Step 4 


Thirdly, I took a matte silver/grey colour and applied it to the area in between the black and silver shade across the middle of the lid (image in step 2). I applied this on a smaller eyeshadow brush which is shorter and more precise to pack that colour into the gap. 

Step 5 


Then I applied more of the silver shade that I applied in step 3 with the eyeshadow brush and my finger. I also took my blending brush again with the light matte black shade and linked it up to the outer corner of my eye. 

Step 6 

 
This step, which is my favourite step. I took my smaller eyeshadow brush again to get a more defined shape of the black above my crease and to get a darker colour - ultimate daring smokey eye. So what I did was I took a darker black and went over the lighter black and I linked it to the bottom lash line by smudging it along. 
As you can see, I also made the outer corner link to the bottom lashline by making it thicker and winged out in a V at the end. 

Step 7 


Then I cleaned up the edges and sorted out the black lines at the top and connected both into the silver shade. 

As this is a blue toned eye look. I found a Cinderella light blue glitter shade in the pallet and applied this over the silver lightly to give a nice mix of both shades.

I also took the black on the smaller eyeshadow brush again and defined the shape of the silvery blue shade into more of a mini V shape to match the black V.  

Step 8 


Finally for the eyes, apply your favourite mascara, mine is Lash Extreme Volumising mascara with Maybelline's The Falsies on the top. And then your eyes should look something like this! This look is all about blending and making the colours flow as if it wasn't blended it'd look awful. 

Step 9 


Finally I added a neutral lipgloss colour and took my plaits out and then this is the finished look! I decided to not add any real colour on lips because there is so much going on with the eyes that the lips were not needed for this look. 

I also decided to keep my face pale because I felt like it looked nicer without a blush as it was a really silvery blue and I don't think the blushes I have would've looked right. I also didn't apply highligher - I could've done but when I was doing this look it was before I went out today, so I didn't have time to add any. 

Thank you everyone so much for reading! I hope you liked my take on a party look, obviously there are so many different things you can do with black eyeshadow as it goes with every colour. If you wanted to change it up you could just change the silvery blue to whatever colour scheme you're going for, for the party or the reason why you want to wear this makeup look. 

But anyway, I will being doing some more posts soon as I don't know what is next on my list to post. But until then, bye for now and speak to you soon! 

Katie 
xoxoxo