Wednesday, 9 September 2015

Roaring Tiger Haul!


Hello my lovelies, I hope you're all doing well and aren't feeling too down now that school and college has rolled back around. For me this is a very exciting time as I am off to uni in 2 weeks! I haven't been posting much recently because we've been so busy with buying all the things I need for uni. We've got a few more things to buy but were almost there. 

So recently in my local town we got a new shop called Tiger and if you don't what Tiger is, it's basically a shop full of a bit of everything. It's got stationary, nic-nacks, sweets, kitchen ware, and just random little gifts you could give to people for Christmas or their Birthdays. Every time I go into town I've been going into Tiger as each time I go in I notice something else I really like but the main reason I've been going in there so much is because; I'm going to uni extremely soon and I decided to get a personal organiser/ filofax from WHSmith because they were on sale and are still on sale. 

So if you've been thinking of getting a personal organiser and want to buy one for a cheaper price here is a link to go and check all of them out: http://www.whsmith.co.uk/search?keywordCategoryId=&keywords=filofax&results=60&page=1&performSearch=true


One thing that has been really hard is finding planner stickers to help plan my weeks out and organise my life. You don't have to use stickers and all things pretty but as I am a creative student I love to customise things to my personal preference. In the UK we don't have a Target or a Walmart and I know a lot of people in the US buy washi-tape, and lots of stickers, and pretty paper clips etc from those shops. Mostly I've been finding a lot of free printables on Pinterest and I created a board full of all my favourites and if you guys would like to check that out here is the link: https://www.pinterest.com/katiej0907/organiser-printable-pages/

I went into Tiger because it recently opened and I just felt like looking around and I found a lot of really lovely things in there. I was pleasantly surprised at how much I am in love with this shop now and I'm most likely going to go in there again tomorrow as well. They have a big variety of things and the best part is they're not overly expensive either. 


Firstly I picked up this cloud shaped tape dispenser that has rainbow tape in. I really thought this was adorable how both things were linked together. I bought it because it was a type of washi-tape to use in my planner and for any other things I want to add a bit of a personal touch to. 

Price: £2.00 


These next two items I thought were pretty vintage and for me I remember the days when I had to listen to music on tapes in my old CD and tape player and also I remember the days I had to use floppy disks to save work on back in Year 6. So for me these are a bit of a throwback to my childhood and I thought they were just a really cool pack of sticky notes to use for anything I need to write down to remember or stick into uni books etc. 
Price: £1.00 each


This next item was a bit of a random purchase but I do not have enough coloured paper in general. I like to use coloured paper to pin point things that I need to remember or that are important and that way my eyes will be drawn to the colour. I also thought I could use this to make my own coloured page flags for my planner as all the ones I print off are either too big or too small for me to deal with and I think it might be easier just to make a few of my own.

 I also like this notebook because it's not very big which means it's easy to carry around. I also like how it has an elastic because it means the paper inside wont get damaged as it's all packed tightly together. The final thing I love it how the outer edges are rounded. 

Price: £2.00 


I think these are one of my favourite things I've ever bought. They are just pegs with strawberries on top. The strawberries are quite pop art styled and fun which is what I like. I am going to use these for decoration and to peg the week we're currently on in my planner so I can just automatically flip to that week instead of flipping through every page to get there. 

Price: £1.00 


I bought these heart stickers again for my planner and just to decorate the pages and make them look pretty. You can't go wrong with some heart stickers. Plus they were 2 for a £1.00!

Price: 2 for £1.00 


These bicycles clips I absolutely love! I don't think I'll be pinning many papers together with them. However I thought they'd be a fun decoration for my planner front pockets and another way to pin things to certain pages that I need to write in later and anything else I need to hold together in the planner. Plus, I don't think many people have bicycle paper clips.

Price: £1.00 


This item is probably the one related to the filofax mostly as I know lots of people have the Filofax branded sticky notes dashboard type insert which is just like this one above. But there's is quite pricey considering it is just a page of sticky notes. So I found this one in Tiger and I thought that's going to be perfect to fit into my filofax when it arrives. Plus, you always need sticky notes for something. 

Price: £1.00 


So guys that is everything I've got so far from Tiger. As you can see from all of the items I've bought they do a really nice range of stationary and decorative styled items that are such good quality for the price you're paying. I've only paid £10.00 all together for all of this compared to most places where this would've costed nearly up to £20.00 due to the types of items I was purchasing. But I urge you all to go into a Tiger shop if you have one near to you because it really is a wonderful and quirky shop that I am in love with already. 

Thank you for reading and I will talk to you all soon. 

Bye for now, 

Katie
xoxoxoxoxo


Tuesday, 4 August 2015

Banging Fizzbanger!


Fizzbanger Bathbomb Review 


Hello my lovelies, I hope you're all well and are having a good summer. Today I am here to review this gorgeous bathbomb above from no other shop, but Lush! For my birthday my friend gave me the 'Happy Bathday' set and it's got some really wonderful smelling products in and Fizzbanger happened to be one of them. I've been meaning to use the products for ages and finally last night I used this one and decided to review for you today. 


Lush Description:

A Catherine wheel of a bath bomb. It changes colour as it fizzes, crackling with popping candy as it goes and releasing first a citrussy apple and then a cinnamon, apple pie like scent with a hint of ylang ylang. Petitgrain is used in aromatherapy to calm the breathing, slow the heartbeat and reduce feelings of anxiety. Ylang ylang produces a feeling of joy, and cinnamon leaf oil helps you let go.

Ingredients
Sodium Bicarbonate 
Citric Acid
Popping Candy
Cream of Tartar
Cinnamon Leaf Oil 
Petitgrain Oil 
Ylang Ylang Oil
Lauryl Betaine 
Sodium Laureth Sulfate 
Oak Moss Extract
Citral 
Cinnamal 
Coumarin 
Geroniol
Limonene
Linalool 
Perfume 
Colour 42090
Colour 47005 


All of these ingredients create this wonderful bathbomb. I wasn't really sure what to expect from this bathbomb. But it had a really lovely fresh citrus aroma that wasn't too overpowering. 

When it started to fizz away it was a burst of pastel lemon yellow colour which was so interesting because it look a lot brighter in the bomb and became pure pastel yellow which I have some more photos of. Also, the smell as it started to fizz away was amazing. The citrus scent got stronger but not over powering and it just made you want to breath it all in and relax. 


It let out this little piece
of paper that said
 'BANG'
which I thought was
a really lovely touch
After all the yellow had dispersed this gorgeous pastel blue popped out of the bathbomb and it began to create this really pretty tropical lime green water. I became fascinated by the colours this bomb was creating because I just didn't expect it to be as amazing as it turned out to be. 


You can see how incredible it looks from these photos. It only had blue and yellow swirling around in my bath but I couldn't take my eyes off the patterns and the jade green sea colour it was creating because it was absolutely beautiful. 


At this point I couldn't believe what I was watching because it kind of became almost like a blue and yellow galaxy. I honestly thought it was so beautiful, this is bath bomb is up on my list of the ones that have surprised me the most, such as Dragon's Egg (which is one of my favourites) because I really wasn't expecting it to do any of this. I honestly just sat and watched it create this really beautiful galaxy representation instead of actually getting in the bath because I thought it was really wonderful. 


Just look how incredible those  swirls are in this photo. I thought at this point the yellow bomb that was still fizzing away looked like the sun because of the small yellow lines that were whisping around it. I just love the swirly pattern and I didn't want it to end. 

Also at this point also the smell of citrus really was fragmenting all the way through the bathroom.  


Eventually when it all fizzed away the water when this gorgeous jade green and I honestly felt like I was bathing in a tropical sea and I was in the Bahamas or something. All I needed was a cocktail in a coconut and it would've been perfection. 

But getting back to the reality that I was still in my bathroom, I really loved this bathbomb. I really liked the citrus smell because it was really fresh to make you feel relaxed and then when I got out of the bath I felt much more awake because all of my senses had taken in the beautiful smell. 

Another thing I really loved, it did actually pop and bang like it's name which is always pleasing. It also made my skin nice and soft and smell really fresh. 

Finally, something vital, even when it all fizzed away the citrus smell still lingered and lasted even when the water was just green. As sometimes, some of the scents from Lush smell great when it's fizzing away and then when it stops all the smell goes away like you never used a bathbomb. But this one lasted more than 30 minutes which was when I actually got in the bath. I was only in there for half an hour but I'm sure the smell would've lasted a bit more if I'd have properly laid in there for an hour or so. 

Overall, I think this bathbomb is for all ages and all genders because I can see it being the boost you need if you've had a bad day or if you need to wake yourself up a bit. 

I absolutely loved this bathbomb and I think it is my new favourite. The colours combined created something really beautiful and different from what I normally use. The smell was amazing and it just enlightened my mind and senses. I will definitely be buying it again very soon!

Price: £3.35

Katie's Rating:

Tuesday, 28 July 2015

Rocking Rossetto!


Hello my lovelies! I hope you're well and today I am doing a review for you all which I haven't done for exactly two months. But this review is something I've really wanted to do ever since I bought this during my holiday because I've been using it non-stop ever since! But, before we get into what I'm gonna be reviewing and raving about for you guys today. I just thought I'd show you this makeup look above. This is my natural everyday makeup that I always go to these days as it really doesn't take too long. 


So recently I've been wearing on my face: 
  • Base: Morning Baby! BB Cream from Miss Sporty in Light (absolutely love this!)
  • Concealer: Lasting Perfect 24HR from Collection in Fair
  • Powder: Stay Matte from Rimmel London in Transparent and then Matte Maker from Maybelline in Classic Ivory over the top 
  • Blusher: Mosaic Blush in English Rose from MUA
  • Highlighter: Undress Your Skin Shimmer Highlighter from MUA
  • Eyebrows: Brow Drama Sculpting Brow Mascara in Dark Brown from Maybelline (normally fill in with Brow Satin in Dark Brown from Maybelline as well but wanted something more natural today) 
  • Mascara: Colossal Volume Express Mascara in 100% Blackest Black. 
  • Lipstick: Kate Moss Nude Collection in Rossetto from Rimmel London 
And judging by the title, that lipstick is what I am reviewing for you guys today! 


I bought this on the first day of my holiday because many makeup stands had deals on and Rimmel happened to be one of them. I decided to try out one of Kate's lipsticks because I've never tried one of her lipsticks before. So I thought as she had brought a new collection out why not try and find a good nude to suit my skin tone. 

I wasn't expecting to ever own a nude lipstick purely because I am so pale and have cool toned skin, therefore many nude lipsticks look absolutely ridiculous on me. The majority I've ever tried have made my lips look like I've got concealer lips and no one wants that look! 

So I found this one in the shade Rossetto and I quite liked it because it was a more pink based nude. It was good for me as I also have pink undertones to my skin. So I swatched it in Superdrug and really liked it so I decided to get it. 

Obviously firstly what attracted me to it was the packaging. I really love the packaging. I think the colours are really lovely together and it is very feminine but not overly girlie so it will attracted all ages of women. I love how Kate's name is on it in white with a little heart because it's just a small detail that I really love. 


Here is a close up of the lipstick bullet and you can clearly see how much I've used it because it has gotten so short which means I'm gonna have to buy another as soon as I go shopping. 

The swatch is this muted pink taupe sort of shade and it's really complimenting if you're like myself: pale, cool toned skin, and has pink undertones as well. When I put the colour on I was surprised with how much it suited my skin because normally no nude lip colour does and after using it only twice I think, I fell in love with it completely and haven't stopped wearing it. 


Here are some close ups of me wearing the shade and you can already see how lovely it combines with my skin tone. The pigmentation is really good considering it's a nude lip shade and one thing this lipstick really does do well is it makes your lips appear bigger than they actually are. I only fill slightly over my natural lip line just so both sides of my lips are evenly rounded. When I first wore it I couldn't believe how big my lips looked but they still looked natural at the same time. 

Another thing I love about this lipstick is how easy it is to apply from the bullet. Most of the time I have to use a lip brush to line my lips first and then fill them in. However with this I can just load it straight on because it is a lighter colour and it's not much of a big deal if I slightly get it on my skin. I can wipe it away easily with my finger, whereas with a colour such as red if you try and remove it with your finger it stains more into your skin and makes your foundation appear pinky. 

Something else I love is how creamy this lipstick is but dries kind of matte. It's quite interesting as it's nice and creamy when you put it on and you can easily add more throughout the day but it sort of half dries. So it isn't rock hard on your lips but also not all over the place either. 

Here's a shot just to show you guys how big my lips appear to be with this lipstick and how lovely it looks with my skin tone. (both colours are the same it was due to different lighting)
I also think that this lipstick colour is a really good dupe for Velvet Teddy by MAC. I do not own Velvet Teddy but a couple of my friends do and this colour looks very similar for a fraction of the price. I would highly recommend this colour and the rest of the range to everyone to find the shade that is right for you. When I go and purchase another one this colour, I think I will look to see if there's anymore in this collection that will compliment my skin. 

From: Superdrug/ Boots 
Price: £5.49 


I hope you enjoyed this review my lovelies and I will see you in my next post!
Bye for now, 

Katie

xoxoxoxoxo

Tuesday, 14 July 2015

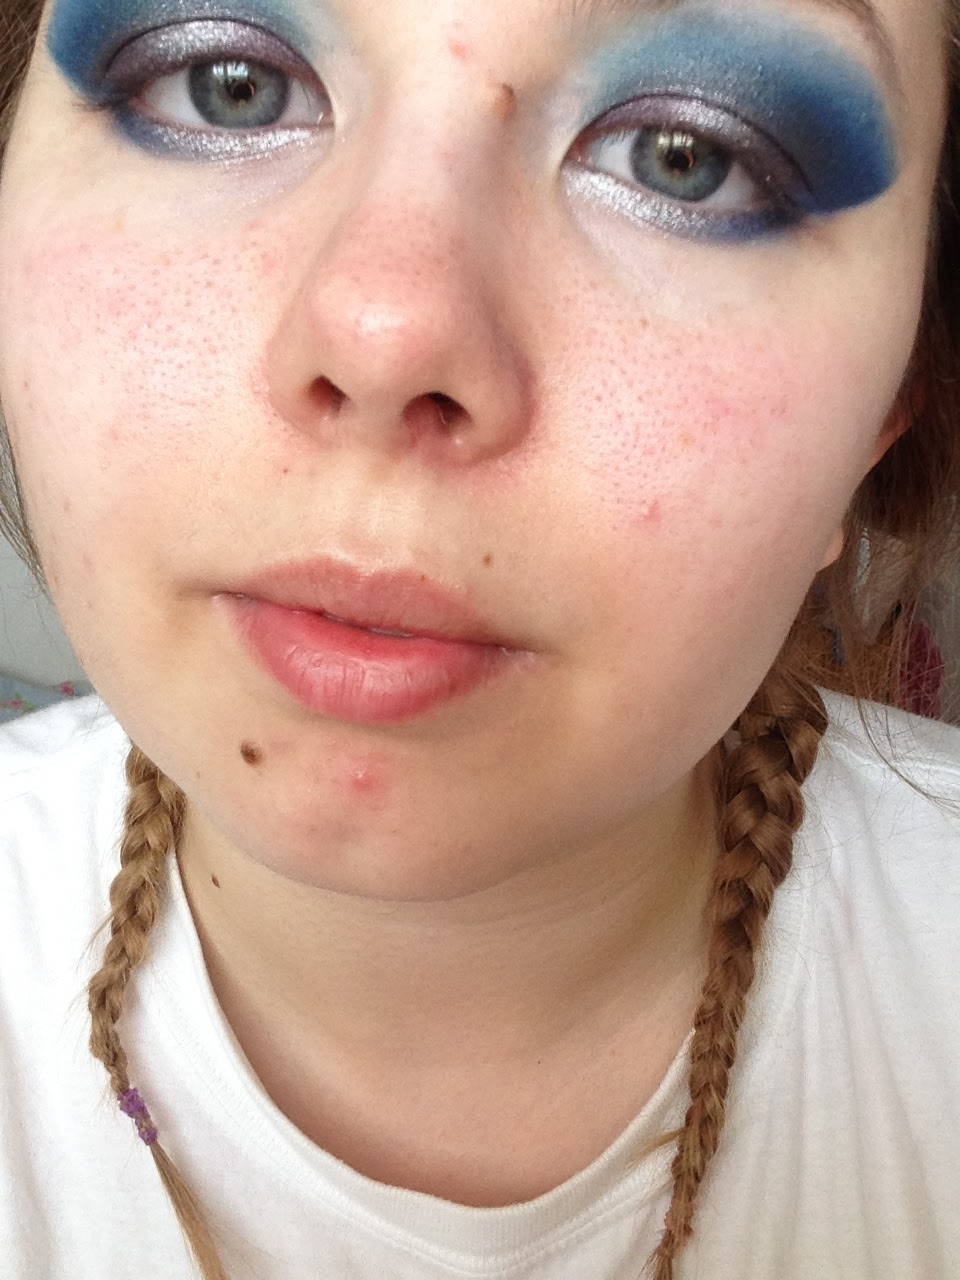
Ocean Blue Summer Mermaid Makeup Tutorial!


Hello my lovelies and finally we are here today doing a makeup tutorial!!! This has been a makeup look I've been meaning to do for a long while now and as you can see my the title it is my version of mermaid makeup. I've seen many YouTuber's creating mermaid makeup and I really wanted to do my own. So this is an ocean blue and teal inspired mermaid look; capturing the beauty of ocean shades with the silver glimmer's on and under the eyes. So, let's get into the tutorial! 


Step 1


Firstly I took some tape and placed it where my lower lashline leads on from. This is just to give us a sharp straightline when we're finished with the look. Then once the tape is placed just take a white eyeshadow and apply it all over the lid. This is so our colours will really pop out as the blue's are very bright and we want them to be as vibrant as possible. 

Step 2


For this look I am using the pallet called Colour Chaos from Makeup Revolution, here is a link for you guys to go and check this pallet out and all of their other amazing pallets http://www.makeuprevolutionstore.com/index.php/palettes/3-for-2-salvation-palettes-pro-looks-palettes/salv-colour-chaos.html 

Go and check them out as they have some great offers on right now and their pallet's like this one linked above are on 3 for 2! 

So anyway, taking the colour Ammunition from the pallet, it's this gorgeous deep purple shade with shimmer in. I am just applying this all over the lid but not up into the crease, just on my main bit of the lid. Don't worry about the line along the tape because we cover this up later on. 

Step 3 


Now, taking a mix of On A Mission and Deliver Me on a flat shader brush I am taking this mix through the crease on the more rounder side of the brush, not the flat side. Again, do not worry about the neatness of the colours blending because we'll sort it out later. Just focus on packing that colour on your crease and shaping it. 

Step 4 


Now taking Over-bored (a bright sea blue) slightly mixed with On A Mission (the teal) I am blending that through the crease and creating a round shape across the top of the lid with my Urban Decay fluffy brush. As you can see from the image above it's created a really nice blend of the blue merging with the teal. 

Run the Over-bored blue along the tape line and take it over the edge of the purple that's along the tape line. 

Tip: Do not blend too harshly with the blue because it is super bright and you don't need to force it onto your eye lid. Just light and fluffy strokes with distribute the colour nicely, as well as making it look really beautiful along the way. 


At this point you should have 2 gorgeous sets of ocean mermaid eye lids. As you can see here, both the teal and blue have blended nicely together. Also, I ran some of the Over-bored blue on the outer lower lashline where it runs into that blue. 

Step 5 


Now carefully remove the tape and we have a gorgeous sharp line I was talking about earlier. This was actually the first time I'd got them placed pretty similar and I didn't have to go along the line and add any extra shadow or take any away with a makeup wipe. 

But whilst were at this point, if there is any certain colours your want to add a bit more of or blend more now is the time to do it. 

Step 6 


So I added a bit more of the purple shade and blended it into the teal as even though the look is mainly focused on the ocean tones, I still wanted the basis of the purple to be there. So I took a bit of time to build up that colour and blend the teal shade into it and vice versa. 

Now for a really fun part of this tutorial. As the sea has that glimmer that goes across the water when the sun shines on it, I decided to add that into this look because it would be more eye catching for the look itself, for people who look at your makeup, and make it look more pearly in the light. 

I am taking the colour Gleam which is a gorgeous pearl silver shade. I wet my brush and applied this on my lid so it would be brighter. However, to make it look seamless we need to blend it into the purple. But because my brush was wet, I took a dry brush I used earlier and re-applied the purple colour to that brush. The easiest way to do this is to wiggle the brush into the silver and then slightly wiggle the silver into the purple if you need to add more. It can take a bit of time but worth it for the result. 

Tip: Wiggle the purple into the edges of the silver because if you sweep it through you wont get the gradual ombre effect and that ombre effect makes it seamless.


 Now this is currently how both of our pretty mermaid eyes should look!

Step 7 


Taking Gleam again, I am applying it along the lower lashline and merging it into the blue. Taking Over-bored again, I am just defining that ocean blue shade by lightly merging into the silver and pressing the blue colour to make it deeper nearer the outer lashline. 

Step 8 


This next step is completely optional, you can always stop at the silver and just add your mascara and apply your face base. But as I love my glitter and I just thought why not go all out.

Taking my Model's Own glitter in silver and one from Primark which has colourful flex in different lights that you can see in the picture. I thought these could represent mermaid scales. 


So you want to take a glitter eyeliner in silver or a glitter adhesive if you have one and apply it to your silver shaded areas. You can apply it on your lid if you wish to, I just didn't want to. I applied it to my bottom lashline. Then taking a applicator from the Colour Chaos pallet; get some setting spray or a makeup wipe and wet your brush and pick up your glitter within your pot and gently apply it to your lashline. Apply as much or as little as you would like. 

Tip: Do not throw the applicators away because they are handy for things like applying glitter to your eyes and coating up certain colours on your eyes. They are more dense than normal flat shader brushes which is why they are helpful for packing colour onto your lid.

Tip: If you are applying glitter be super careful not to get it into your eye. I've got it in my eye before and it isn't a nice experience. It's not so bad for the lower lashline because it can't fall through your lashes it will just fall onto your cheeks. But if you are applying it above in any makeup look, not just this one, be extra careful as the loose glitter that falls can slip through your eyelashes and fall into your eye. 

Then once you applied your glitter go a head and apply your base. If you all know me, I do not apply my base first because of fall out from the eyeshadow. It is easier to clear up if you do not apply your base first. I did get some fall out with the blue eyeshadow I used so just be wary of that. When you apply your concealer etc just be careful around your eye area to not smudge the glitter as it is still slightly setting into place. 

Step 9 


Finally I applied my base. So for this I didn't use foundation just because I couldn't be bothered and I didn't want a super thick base as it was quite humid today. So I took my Collection Lasting Perfection 24HR Concealer in the shade 01 Fair and just took it in all your usual concealer places and over a few blemishes as I've been breaking out a bit recently. Then I just blended all this in with my Real Techniques Beauty Blender. After that concealer, I took another one that is more like a highlighting concealer as I went for more of a highlighted look due to the colour of the eyes, I didn't bronze anything out and I think my skin looks better that way. 

I took my The One concealer by Makeup Revolution and applied it on my chin, my cupids bow, the tip of my nose and the tops of my cheeks. It is super creamy so do not apply too much or else it'll never set! Then I took my Matte Maker from Maybelline and applied this all over my face. First using a huge brush and gently patting and then taking an actual sponge and patting in certain areas as I like my whole face to be set down. 

Next I filled in my brows using my favourite brow product ever, the Maybelline Satin Brow in Dark Brown along with Maybelline's Brow Mascara in Dark Brown also. 

Then I went back to the face, apply my Natural Collection blush in the shade Peach Melba. I wanted something really natural and nothing with too much colour. Just wanted to keep it really natural. 

As I felt the creamy concealer wasn't enough, I went back and highlighted my face with my trusty Undress Your Skin shimmer highlighter from MUA. 

Finally, I applied my lipstick. Now you don't have to use pastel purple if you don't want to, you can go for something more natural or more your style to go with the eye look. But I really wanted to as I felt like this pop of colour really complimented the colours used, my skin tone, and tied the whole look together. 

Then finally, you can't be a mermaid without wavy hair, so I took my plaits out and then I'm ready to go and be a mermaid! 


So that's it for this makeup tutorial you guys, I hope you enjoyed it as much as I loved creating it. I am so pleased with how well it turned out. I've been meaning to do it for ages and I am really happy I finally did. I've even still got it on right now and it's still looking pretty perfect even about 8 hours after doing it. I'm definitely gonna wear it again!

So guys, my next post is going to be 'My Summer Shoe Collection' and I am hopefully going to do all of that tomorrow. So fingers crossed! 

Anyway guys, thank you for reading if you did and I will talk to you super soon! 

Bye for now, 

Katie 

xoxoxoxo